Scroll-sawed Frame Ornaments
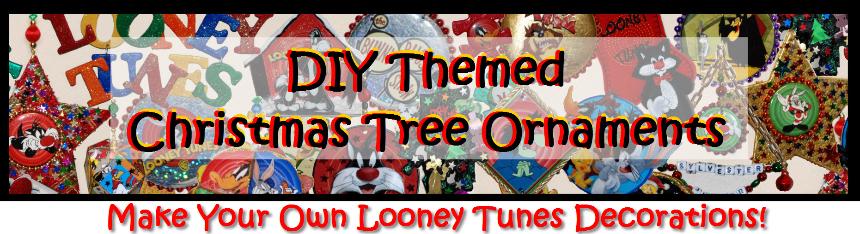
What would Christmas be without Marvin, especially since he's already decked out in Christmassy red and green?
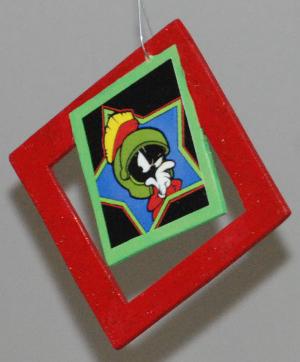
The expression on Wile E's face is always precious; the gold frame picks up the color of his eyes.
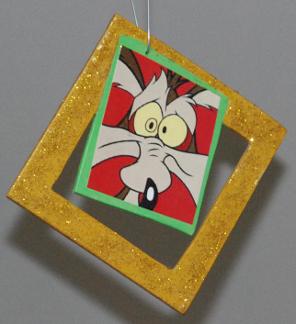
In "Frigid Hare", Bugs befriends this adorable little penguin whose tears turn instantly to ice cubes. He's earned a spot on our Looney Tunes tree, but first I'll have to show hubby the cartoon.
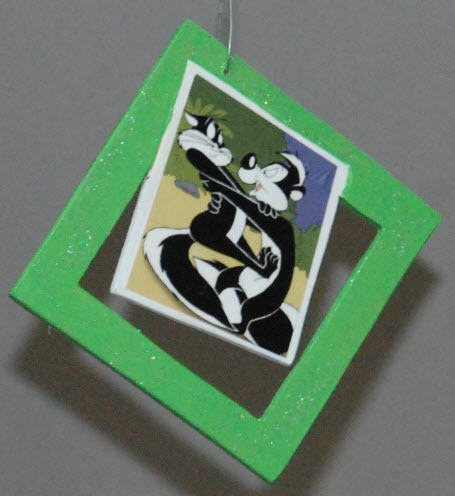
Pepe's antics are always good for a smile. As for all the ornaments, I coordinated the colors in the frames with those in the image.
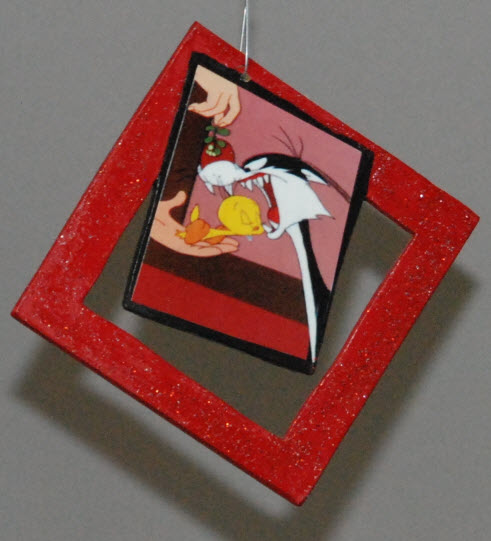
This moment from "Gift Wrapped" goes by so fast that you don't see this expression cross Sylvester's face. Granny makes him cough up the bird right away, but this image is fun for the legions of fans who kind of wanted him to catch Tweety.
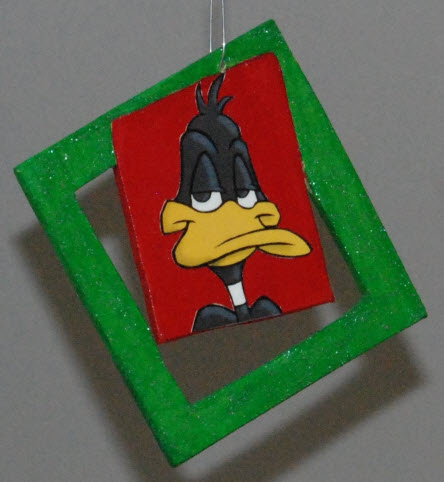
Ya gotta love the expression on Daffy's face. He's one of our favorite characters.
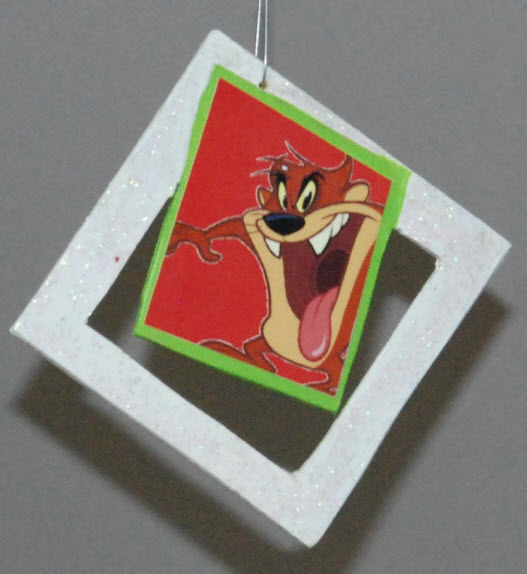
And there's always Taz. I like the iridescent glitter on the white frame.
While I was playing on the scroll saw I thought I'd try my hand at these cute "framed" ornaments, which are similar to one I saw at a craft display. (Scroll to the bottom of this page to find the template for making the ornaments).
I made these ornaments from 1/8" hardboard (masonite), but similar ornaments could be made using cardboard or even foam core board; my crafty sister is using mat board to make her versions.
I made my ornaments two-sided, though if you wanted you could leave the back side plain. The two-sided version uses two copies of the image; most of mine came from an old page-a-day calendar, but if you're printing them, you could reverse one for the back side of the ornament. Both images are decoupaged onto the frame after the painting has been done.
To make the ornament I used the template that you can find at the bottom of the page. I sized it to about 3" wide, printed it on paper, and cut it out with scissors. I used a pencil to trace the shape onto a piece of hardboard and then cut it out on the scrollsaw (it does involve an interior cut, so I had to drill a hole for the blade before I cut out the middle). I was kind of out of practice on the scroll saw when I made the first ones, so my cuts on these weren't perfect, but fortunately the imperfections don't show too much when the ornament is painted, and your ornament will still be attractive even if the cuts aren't quite straight. (As in everything, practice makes perfect; my technique improved markedly after I cut the first half dozen).
Once the ornament shape has been cut and lightly sanded around the edges, drill a small hole to accommodate a hook or string for hanging (at about 3/4" from the edge, or at the position indicated by the red dot on the template). Then wipe the ornament with a tack cloth to remove any sawdust residue.
Using acrylic paints, I painted the frame section one color and the image panel a different color, choosing them to coordinate with colors in the image. After painting, I set the ornament aside to dry for a half hour or so.
I printed my chosen images to approximately 1 5/8" wide (about 1.63"), then cut and trimmed them so they would fit nicely into the image panel of the ornament. I used podgy to glue the images in position on back and front and gave the whole ornament a coat of podgy to seal the image and to provide a little bit of shine, then set it aside overnight so the podgy could cure.
Once the ornament was thoroughly dry, I applied glitter glue to the frame portion, coordinating the color of the glitter with the color of the paint on the frame. I love the extra glitz that it adds to the ornament.
Although the samples shown were made on the scroll saw, I have since made these ornaments using three layers of cardboard cut out and glued together with tacky glue (see the two Scottish clan ornaments at the bottom of the page). My cardboard came from discarded puzzle boxes and so was a little heavier than cereal box cardboard, which might need four layers. I traced the shapes and carefully cut them out with scissors, ensuring that they were even. Then I glued them together with tacky glue or glue stick, and once they were dry, I finished them exactly as described for the hardboard. This makes a surprisingly sturdy ornament that is lightweight enough to go on even a thin tree branch. Once they have thoroughly dried overnight, these ornaments stiffen and are difficult to distinguish from the hardboard version.
Foam-core board could also work provided you can cut it cleanly; making multiple light strokes with a sharp craft knife is the best approach. My sister -- an expert in such matters -- prefers to use mat board for the ornaments: it cuts cleanly, is sturdy enough without being too heavy for an ornament, and it takes paint well. And if you'd like to make the ornament slightly heavier, you can use a double thickness. As a bonus, you might be able to glean materials from your nearest framing store, where they would have loads of small offcuts that would be perfect for making ornaments.
I love these ornaments and was having so much fun making them that I kind of went nuts -- I've completed more than 20 so far and have already cut out a dozen more frames.
The design is versatile and the beauty is that these can be made using just about any kind of photo or illustration. They are obviously great for cartoon images like these, but can also be made with vintage Christmas card illustrations (some are shown below), your own drawings or paintings, or even special photographs -- perhaps school pictures -- or other treasured images.
Not Just for Looney Tunes . . !
I finally had to stop making Looney Tunes versions of these framed ornaments, since I was at risk of filling up the entire tree with just them, so I turned my attention to other subjects. As you can see from the examples below, the little frames will work for any theme, and once you've got the shapes cut out, they are so much fun to make that you can't stop. At least I can't seem to . . .
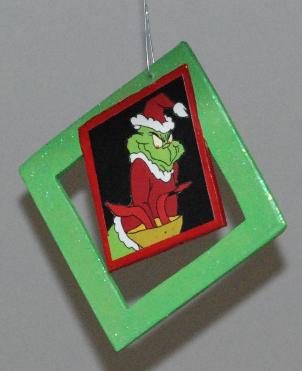
The definitive Christmas special from my sister's childhood was the cartoon version of the Grinch. She is going to love this ornament.
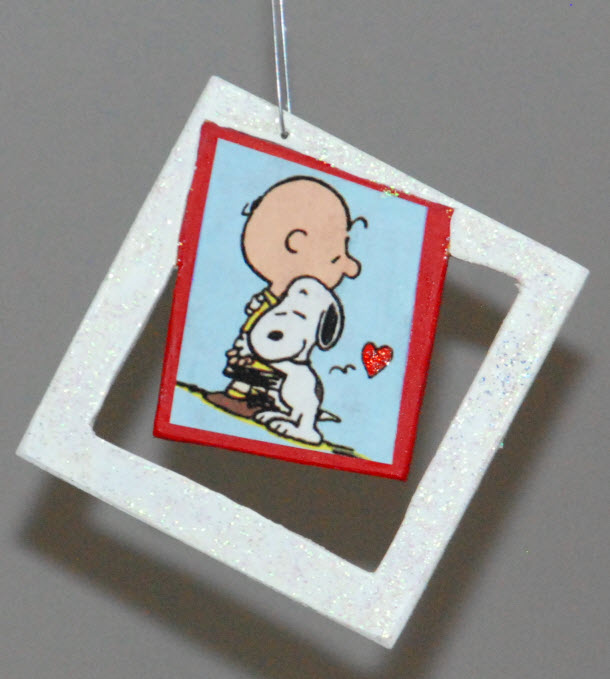
Two of my siblings adore Charlie Brown; I think I'll have to make a second one of these ornaments so they can both have one!
The white frame is finished with iridescent glitter, and I added a touch of red glitter to the little heart.
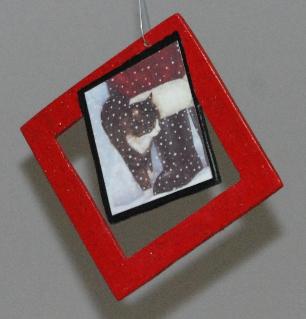
Hubby doesn't know it yet, but he'll be getting this one as a gift from the cats come Christmas. The image was taken from a Christmas card we got last year; this one will go on our non-Looney Tunes tree.
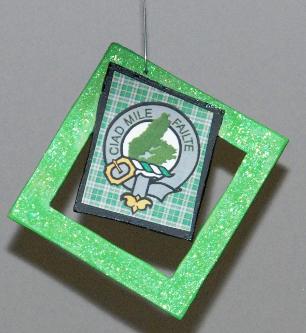
Cape Breton is one of the most beautiful island destinations in the world, and I love to visit whenever I get the chance. This same idea works well for clan badges and coats of arms, along with the family or regional tartan.
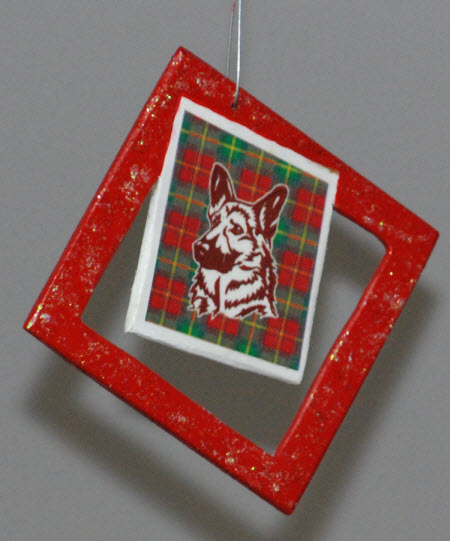
The doggy ornament coordinates with the Christmas stocking I made for a friend a few years back; I'm sure she'll love it.
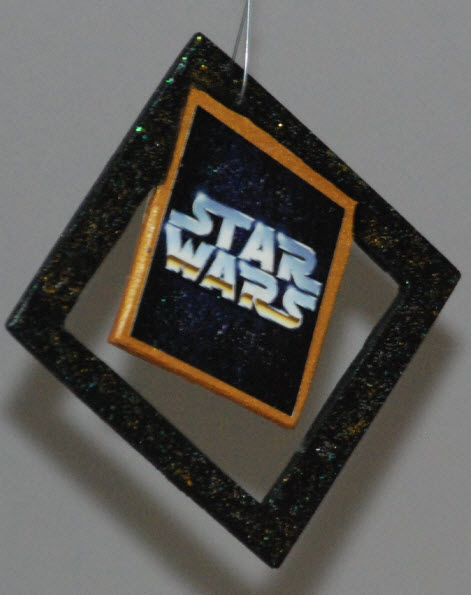
The shape is perfect for "futuristic" designs. On this one I used a light application of three different colors of glitter - gold, iridescent, and silver. It will make a great token for a friend whose husband and young son are crazy about Star Wars.
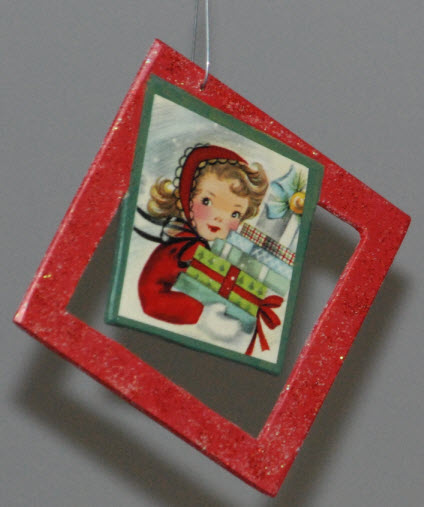
Illustrations from vintage Christmas cards work really well and make lovely nostalgic ornaments.
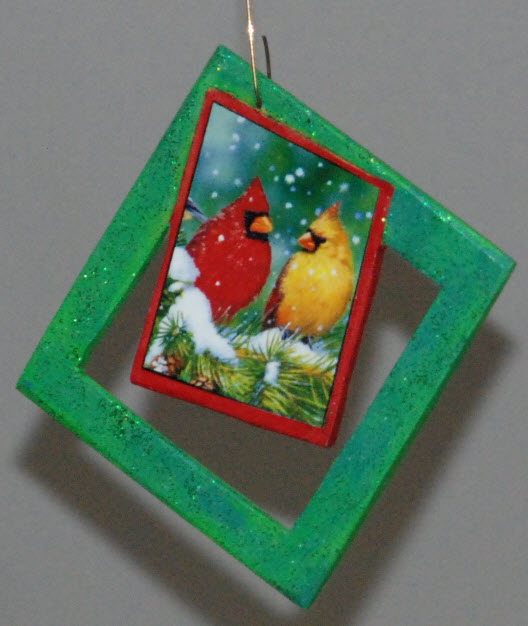
The richly-colored image of the birds (taken from a Christmas card in my stash) is set off nicely by the two-tone paint effect on the frame, which I made by sponging touches of blue-green paint over a base coat of green.
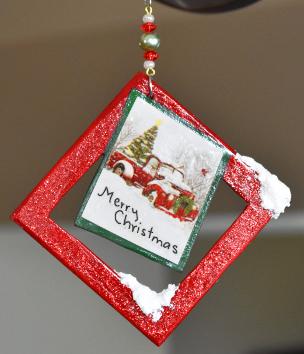
This red truck/Christmas tree ornament has a couple of additional features. The red frame is accented with red glitter and an accumulation of fake snow in the corners. The bead dangle at the top of the ornament picks up the main colors of the image, which was taken from a Christmas card in my collection. The added details aren't necessary but do add a bit of dimension and visual interest, and this one looks great on a green tree.
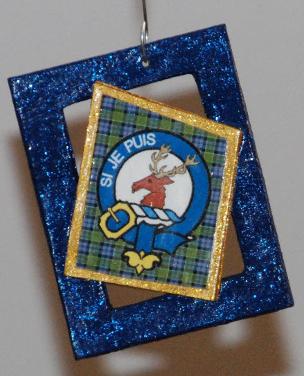
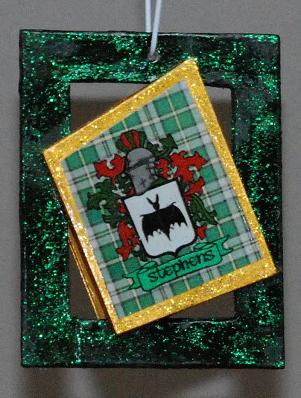
I added these two Scottish clan badge ornaments because of their variations from those above.
First, they are made from laminated layers of lightweight cardboard rather than from hardboard. (I cut out all the pieces before gluing them together.) Once the paint and glue have dried fully, these ornaments are just as sturdy as the hardboard version, and easier to to make since all you need is scrap card plus a good craft knife or pair of scissors.
The second difference is that the frame and the two gold-rimmed image boards are cut as separate pieces rather than a single unit as for the samples above. Once completed, an image board is glued on top of the glittered frame, giving the ornament a bit more dimension and visual interest. The second image board is attached to the back of the ornament, making it viewable from either side.
The "sponged" effect on the frames was made by dry-brushing a bit of darker paint over the base coat, then the whole thing was given a coat of glitter.
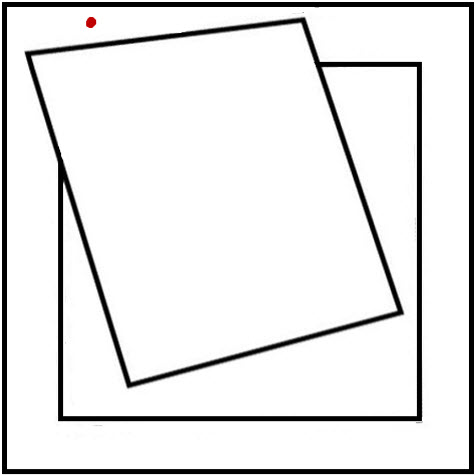
At left is the template for the ornament. I sized it to approximately 3" wide and printed a copy that I then traced onto the hardboard before cutting.
If, like me, you're not very practiced with the scroll saw, you will need to go slowly as it's easy to make a mistake in cutting, especially on the inside cut-out. To cut out the interior, drill a hole first, and thread the blade through it. If you're using foamcore board, mat board, or cardboard, you can cut out the inside using a craft knife.
Don't despair if your cuts aren't perfect: once the ornament is painted up and glittered, little mistakes won't show too much. Plus, these variations are part of the charm of handmade ornaments.