
Geodesic Ball Ornament
These geodesic ball ornaments have been around for years as a way of recycling old Christmas cards or showcasing family photos. There are instructions all over the Internet, so I won't repeat all of the details here; if after reading through you need more comprehensive instructions, you can find some really clear printed instructions and templates at this link, or if you prefer to see a video, Yoyomax12 has a really nice version -- Click here to see it.
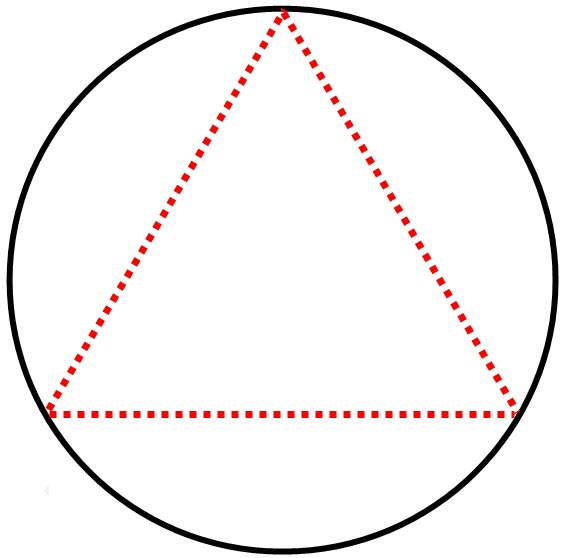
The ornament is made from twenty circles cut from 110-pound cardstock. The edges of each circle are folded toward the center along the red lines shown in the template at right. Then the pieces are glued together using tacky glue or glue stick.
The size of the circles determines the size of the finished ornament; 2" circles make an ornament about 4.5"tall; 1.5" circles make an ornament about 3" tall; and 1.25" circles make an ornament about 2.75" tall.
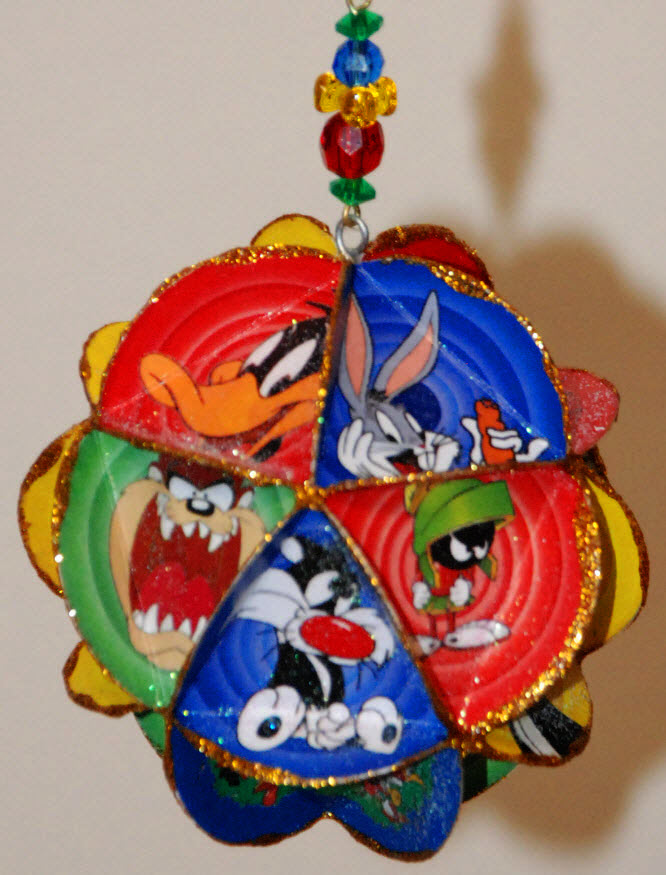
I made my Looney Tunes ornament using brightly colored 1.5" circles showing all my favorite characters; this size makes a nice ornament and the images of the characters are readily visible.
You make these ornaments in three stages: top cap, bottom cap, and mid-section. Five pieces are glued together to make the top, another five go together to make the bottom, and the remaining ten are glued together in a line and then joined to make the midsection. For the top and bottom sections, glue the folded circles with points together, carefully matching edges.
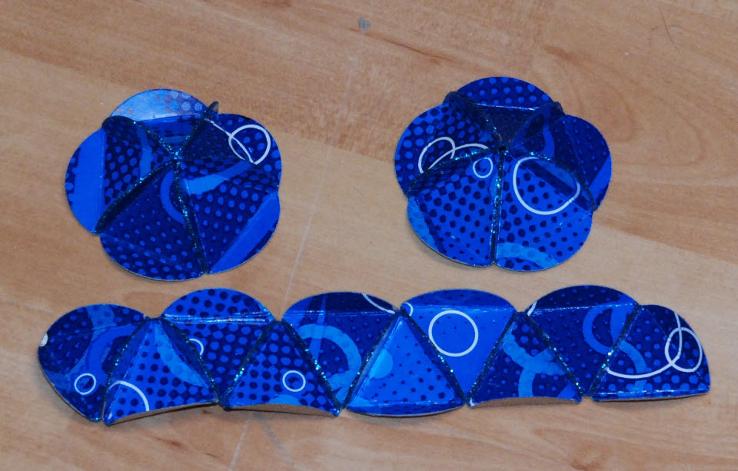
For the center segment, glue the circles together with points alternating top and bottom to form a strip, as shown in the picture. Then glue the last two edges together so that the strip forms a ring (below, left). Once the mid-section is assembled, glue the bottom in position, and then the top. Be sure to line up the edges of your circles as you glue them, for a neat finish.
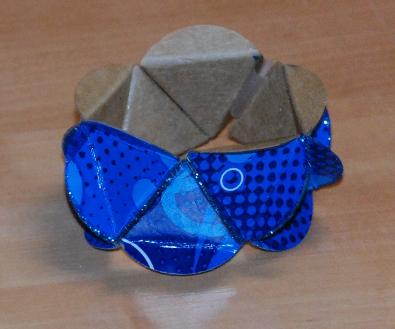
The midsection of the ornament

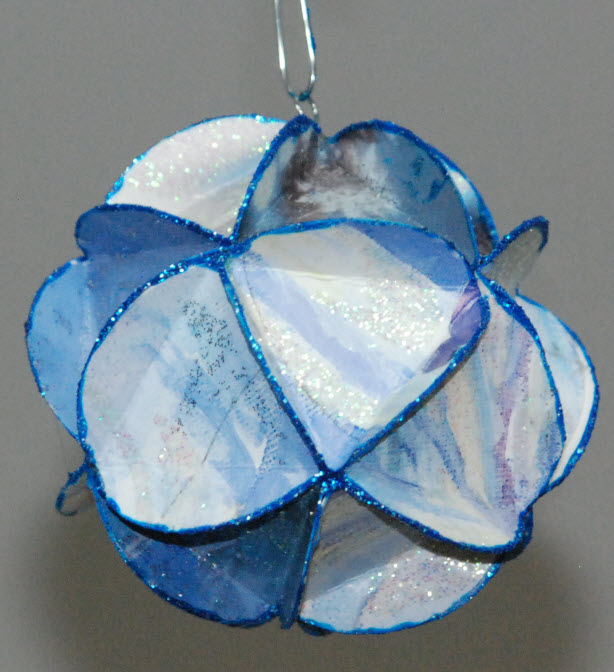
The finished ornament -- note the wire loop at top for the hook.
The ornament in the example is made from randomly patterned card (believe it or not, I cut the circles from a box that originally contained a dozen cans of soda!), so it doesn't really matter which way the circles are oriented.
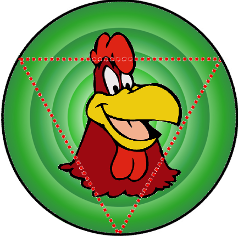
But if you are using images, as I did for the Looney Tunes version, you will want to orient them so that they are all upright when the ornament hangs on the tree. This means that half the circles must be folded with the point at the top of the characters' heads, as shown for Sylvester Junior at right, while the rest are folded with the point at the bottom of the image, as with Foghorn Leghorn.
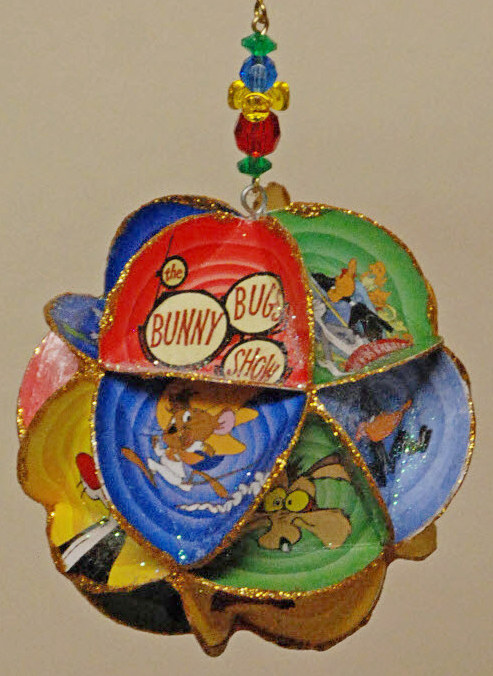
For the top cap, fold all the circles with the point uppermost; for the bottom, fold all the circles with the point downward. For the midsection, half of the circles have the point at the top of the image, and half have the point at bottom of the image. If you look at the photo at the top of the page, you will see that all of the figures are oriented with heads toward the top.

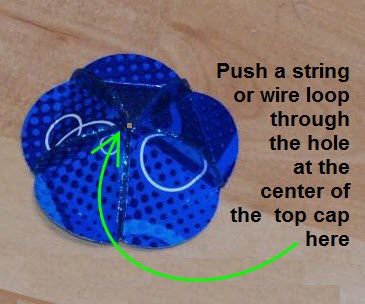
Before gluing the top cap of the ornament in position, you can insert a string or loop of wire for hanging. I like to hang my orna-ments with a hook rather than a string, so instead of inserting a cord for hanging the ornament, I used my round-nosed pliers to make a loop in the center of a 2" length of craft wire. When the top cap of the ornament was assem-bled, I poked the loop up through the center of the top cap, and glued the tails of the wire in place to the inside of the ornament.
Tacky glue gives a really good bond, so the wire loop will stay put and support the light weight of the ornament. Once the glue had grabbed, I continued with the rest of the assembly.
If you wish, you can give the completed ornament a light skim coat of podgy just to seal the images (or you could use a light coating of spray fixative instead). When I use greeting cards to make an ornament, I don't usually bother with the fixative, since purchased cards usually have a nice finish on them already.
If I have podgied the ornament, as I did for the Looney Tunes one above, I usually just blow on a bit of iridescent glitter while the podgy is still wet. If not, as in the blue and multicolored ornaments below, I add just a tiny bit of glitter glue -- enough to add a shimmer but not enough to obscure the design on the card. I didn't do this to the gold ornament below because the foil surfaces are already shiny.
As a final touch, I like to apply a bead of glitter glue to the edges of the ornament using a toothpick. To avoid smearing the glitter, I do this in stages, trimming a portion of the ornament and letting it dry before applying the glitter glue to another segment. It takes three steps to complete all the edges. As an alternative, you could touch the edges with a gold pigment stamp pad or a metallic Sharpie -- it's faster and potentially less messy.
I added a couple of beads to the Looney Tunes ornament, although these aren't really necessary. The beaded segment was made with a length of craft wire; I made a loop in one end with my round-nosed pliers, strung on some colorful beads, then trimmed the wire to about 1/2 or 3/8" and finished off with a second loop. The beaded segment is attached to the top of the ornament using a jump ring. Because I wanted to be able to see all the different images while the ornament is on the tree, I decided to add a spinner (the kind used for fishing lures) so the ball will be able to rotate freely. You can see the spinner in the left hand picture above, attached to the top of the beaded segment.
If it's half decently taken care of and not stored in a damp area, this kind of ornament will last for years. I have some cardboard ornaments on my tree that I have had since the 1980s, and they are still as nice now as they were the first year I hung them up. My Looney Tunes version of this old standby design turned out so beautifully that it's already become one of my favorite handmade ornaments.
Not just for Looney Tunes . . .
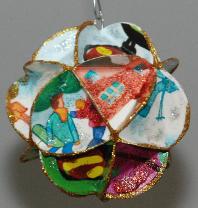
You can make interesting orna-ments from a variety of materials. The first three shown were cut from recycled Christmas cards. The two at right were assembled from 1 1/4" circles, resulting in baubles about 2.75" tall.

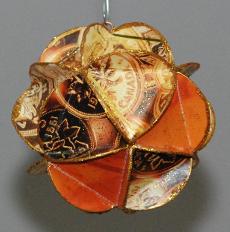
Although it's difficult to tell from the photo, the gold/ivory ornament quite a bit larger; it was made from 2" circles and measures approximately 4.5" tall.
All of the ornaments shown on this page were were trimmed out with a bead of glitter along the edges. You can apply glitter glue directly with a toothpick, or use tacky glue and then roll the edges in glitter. Either way it's a nice finish.
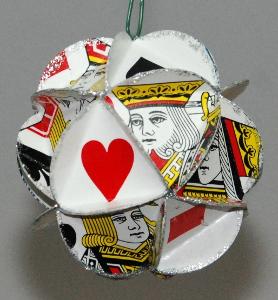
Here are several more possibilities: gold/ copper one began life as a financial brochure, hence the coins; the face cards from a discarded deck make a nice ornament for a card-playing friend's Christmas tree.
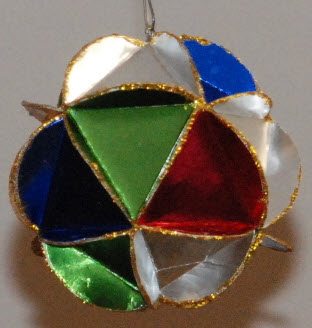
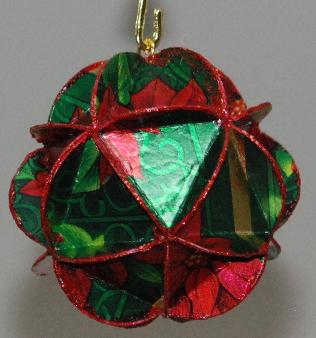
Combine several colours of foil cardstock to make a lovely ornament; for even matching, use five colours (I had only four).
The red and green poinsettia ornament is made from foil gift wrap glued to 110-lb cardstock. I love the effect.
For another variation, try using multiples of a single image for all 20 circles. You'll have to fold half of the pictures with the point at the top, and half with the point to the bottom, in order to keep all the images oriented toward the top of the ornament.
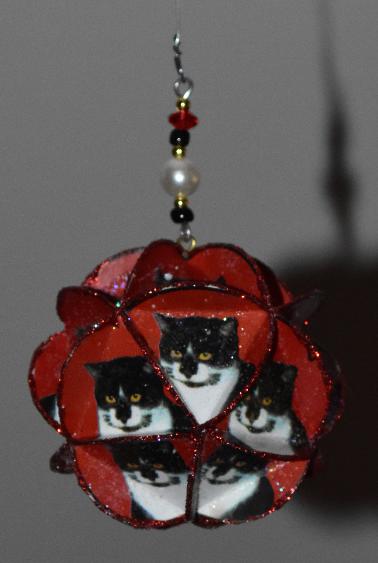
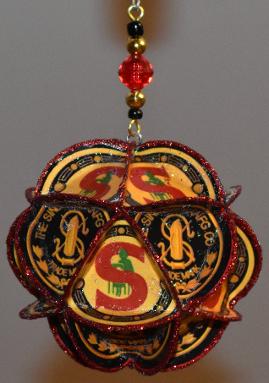
The repeating image makes an interesting kaleidoscopic effect, as you can see in this red ornament of my beloved Meestie, which I made with 1.25" circles. The ornament is about 2.75" in diameter.
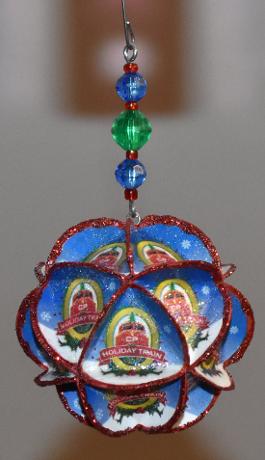
Repeating logos make a terrific effect, like the Holiday Train image on the blue ornament below. You may not be able to tell from the photo, but this one is smaller, made with 1" circles.
You can even make a terrific gift ornament for a sports fan, like the green Riders Nation ornament at right. The ornament was made with 1.25" circles, and I used black glitter glue to outline the edges.
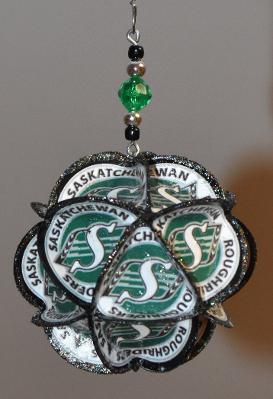
The colors on these ornaments are brighter in real life -- they may look a little cloudy in the picture because I dusted the entire ornaments with iridescent glitter. On these, as on all the ornaments, I coordinated the bead colors to match the colors in the image.
I decided to make the logo ornament by combining two related images. The near right one shows two designs based on vintage Singer sewing machine badges; the far one two versions of the Hamilton Tiger Cats logo.
On each ornament, the top cap uses one image and the bottom cap the other; in the middle segment, the two logos alternate all around the ornament.

I made both ornaments using 1.25" circles, so they ended up being about 2.75" in diameter. I'll display the sewing machine logos on my sewing room tree, while the Ti Cats will grace the main tree in the front room.
I made this last ornament from a box that contained some of my favorite Christmas confections -- Russell Stover's Creme Raspberry marshmallow Santas.
The box displayed ornament balls and wrapped presents nestled in snowbanks against a blue sky with falling snow. It was the perfect size, and the perfect weight, for a Christmas ornament.
I cut the top circles from the blue sky portion of the box, then the rest of the circles from the line of gifts and ornaments. I finished it off with light blue glitter glue, and selected beads to match the colors in the illustrations.
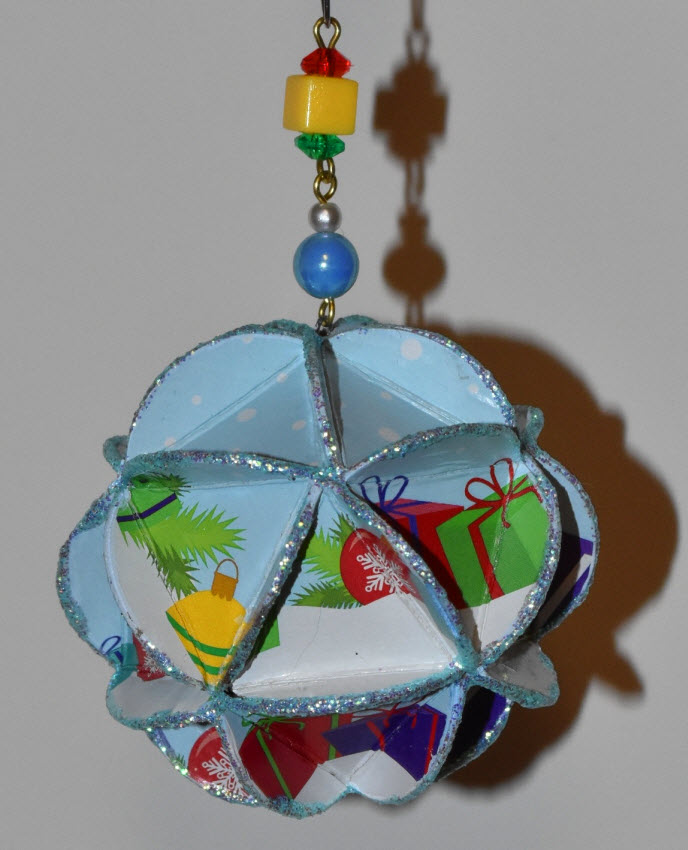
I freakin' love this ornament! It's a perfect size for my tree and a lovely reminder of something sweet for Christmas, without being overtly commercial. In other words, it's perfect!