
Juice Lid Ornament
You might be surprised to find that you can make lovely ornaments using the lids from frozen juice cans: they are not only the perfect size for an ornament, but they provide a natural frame for your images.
Each ornament takes two lids, which are glued back- to-back with a strong glue such as GOOP or E6000. You will need two images printed on lightweight cardstock -- greeting card weight is perfect. (For the ornament at right I used images of Daffy from a page-a-day calendar, and glued these to 110-lb cardstock before cutting them out; the ornament samples below were made from Christmas cards).
Cut your image to 2.5" -- this size circle will just fit into the juice lid. Using tacky glue, stick the image into the recessed side of the lid (the side that would have formed the outside of the lid when it was on the can).
If you like, you can podgy over the image it to give it some shine, as I did for the Daffy ornament. (I didn't do this for the Christmas card ones below because the cards already had a nice surface finish without the podgy).
A line of glitter glue around the inside edge of each lid will give a bit of extra finish and help to cover any imperfections in your cutting. (Because the juice can lid is a rather dull metal color, you might want to add a bit of pizzazz by painting the edge with nail polish or glitter paint before you set the images into the lids.)
When the images are dry, the next step is to glue the two lids back-to-back; before you do this, though, you will need to decide on the method you will use to add a hanger to the ornament.
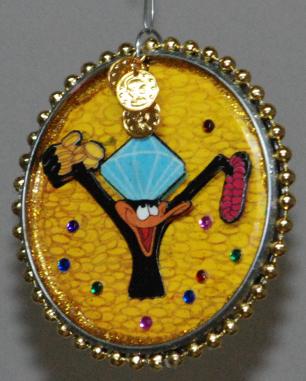
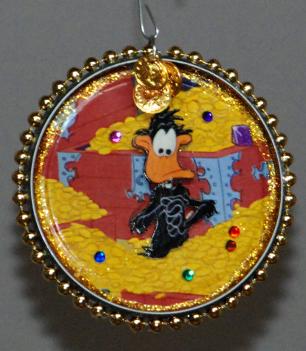
I also glued on some rhinestones here and there among the treasure and gave the pile of coins a light dusting of gold glitter. To complete the ornament I added a dangle of small gold coins at the top.
I often add a beaded segment to the top of the ornament. I make these from a length of craft wire; make a loop in one end with round-nosed pliers, then string on some beads in colors to match the ornament images. Trim the wire to about 1/2 or 3/8" and finish off with a second loop. Attach the unit to the top of the ornament with a jump ring.
Not just for Looney Tunes ...!
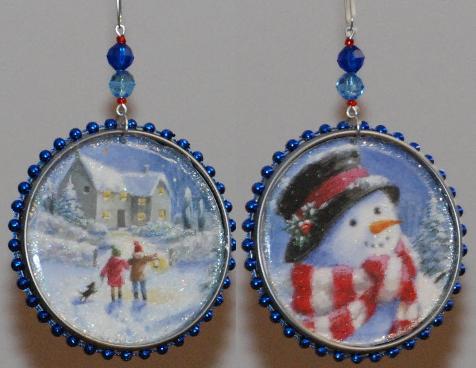
The juice lid ornaments can showcase not only Looney Tunes characters, but also pets, family coats of arms, favorite TV shows and characters, images of places visited, special occasions, nostalgic locales, hobbies, significant people. They are especially nice when made with lovely coordinating images from Christmas cards, as the ones below were, and you can add dangles and beads to suit your taste.

These lovely ornaments with their blue tones look stunning on the tree. Both ornaments used two images from a single card.
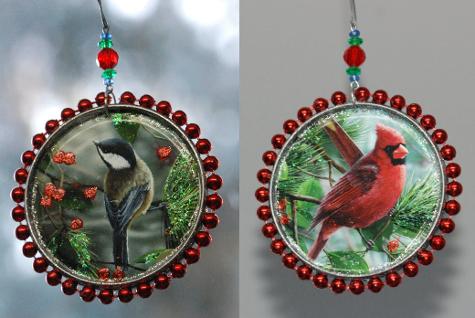
The red bead trim on this ornament is larger than the 4mm size I used on the previous ones, but I quite like the effect. Both bird images come from a single Christmas card. I added just a touch of glitter glue on the greenery and the berries.
These gorgeous scenic ornaments were made using juice can lids and beautiful Christmas cards. For each ornament, I paired two images taken from a single card, and glued them in place with tacky glue.
The cards already had a bit of glitter on them, so the ornaments are quite sparkly. I added a thin line of glitter around the edge of the images just inside the rim of the can, and finished both by gluing a string of fused beads around the groove where the two can lids meet. Use a strong glue (I use Goop) and apply it with a toothpick into the groove, then press the beaded trim into place. Set the ornament aside to dry completely before adding any final touches.
The juice lids are the perfect size for an ornament, but it is also possible to make ornaments from larger or smaller lids. You will need a special can opener that splits the rim rather than cutting through the metal, leaving a smooth edge on both lid and can.
Using lids removed in this way, I have made pretty ornaments from both small tomato paste cans and larger cans that held fruit or tomatoes (see the pictures below). Some of the rim-splitting can openers can also be used on rounded rectangular cans such as those from corned beef, offering another shape option for an ornament (see example below).
It's fun to recycle the lids into pretty ornaments, and nicer still to be able to preserve some of your beautiful Christmas cards. The best part is that when these are hanging on your tree, almost nobody will recognize their humble origins unless you decide to give away your secret.
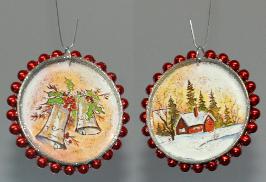
This pretty little bell/house ornament was made from tomato paste lids, which are about 2" in diameter. The beads on the trim are 4mm in size.
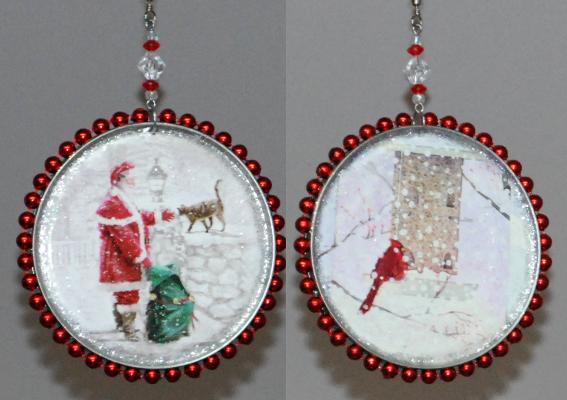
The larger Santa/cat ornament above used lids from a large can that originally held tomatoes, along with images from two different cards. I chose the Santa one first, then selected the bird image because both had the same kind of dreamy, snowy quality. To give an idea of the difference in size, the bead trim on the Santa ornament is 8mm -- the same size as those on the cardinal ornament, above.
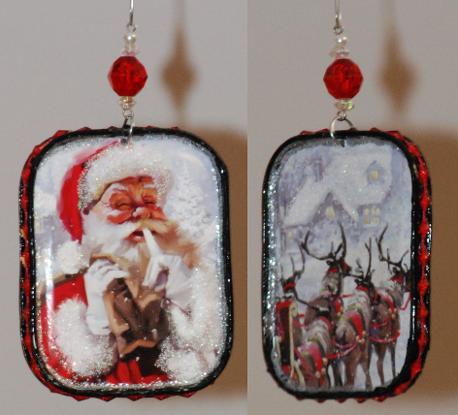
This rectangular ornament is made in exactly the same way as the round ones above, except that the lids were cut from a corned beef can using a can opener that splits the rim of the can. I painted the rims with black paint before gluing the images in place.
Santa and his reindeer came from a single Christmas card. To cut the images I first made a paper template the correct size and used that as a guide for cutting the card. I glued the pictures in place with tacky glue, then trimmed around the edge with a line of glitter glue.
The diamond-shaped fused bead trim was a recent find; I used a toothpick to apply Goop into the recess around the edge of the finished ornament, then pressed the trim into place.