
Cube Octahedron Ornament
As a finishing touch on all these ornaments, I used gold glitter glue applied to the folded edges using a toothpick. The glitter adds a bit of sparkle and also covers the seams where the edges are glued together. To avoid smearing the wet glue, I apply it in stages, adding glitter glue to a small portion of the ornament and letting it dry before applying the glitter to another segment. (It takes three steps to cover all the edges.)
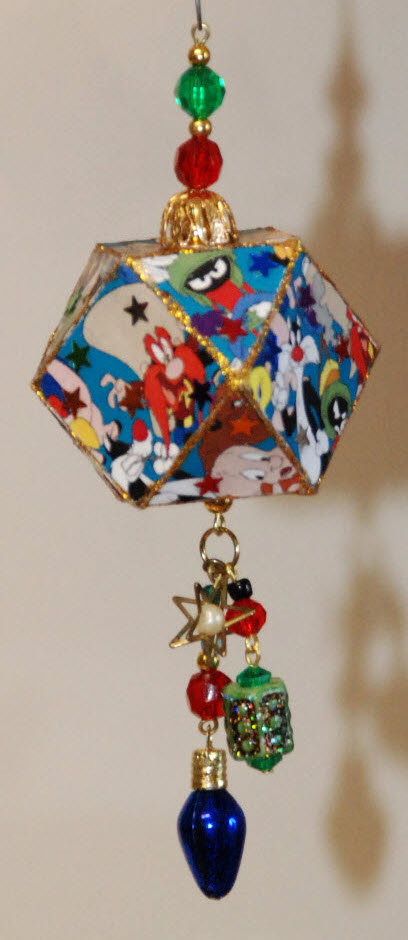
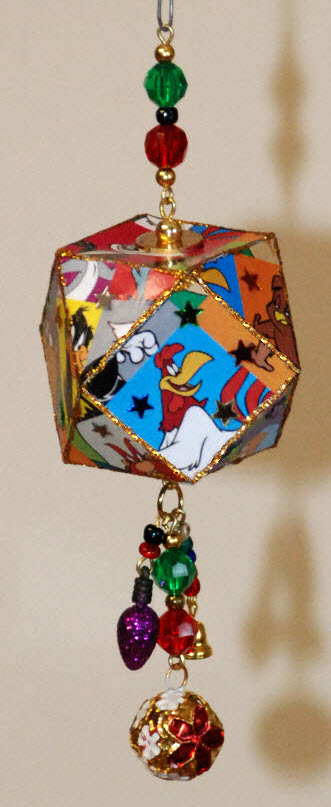
To add a bit of extra visual interest to all three Looney Tunes versions, I glued a few star sequins scattered over the surface to catch the light.
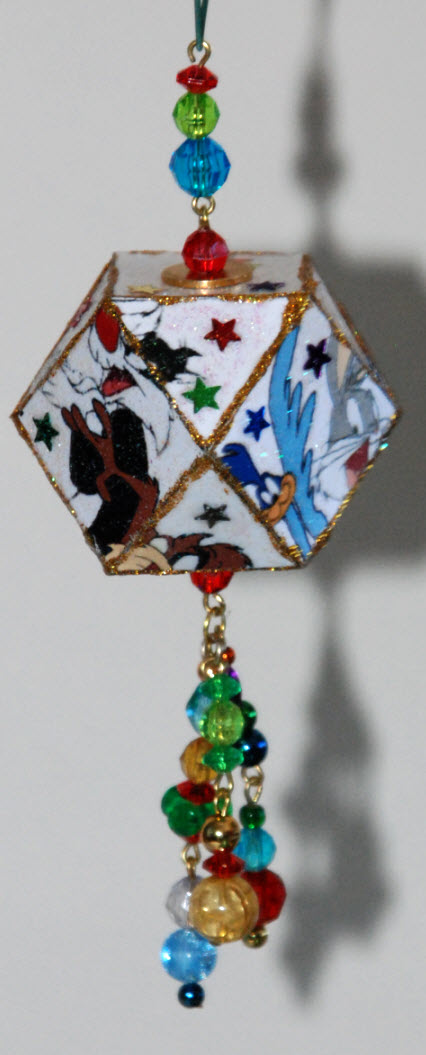
On the white ornament I added a very light sprinkling of iridescent glitter while the podgy was still wet.
I just love these ornaments and have crafted dozens of them! They're made by printing, scoring, cutting out, and carefully folding a geometric shape from card stock, and are a great way to enjoy old Christmas cards that are too pretty to throw out. (You will find the template at the very bottom of this page.)
The Looney Tunes images I used for the three shown were taken from gift wrap. To make them, I printed the template onto plain 110 lb card stock, sizing it to 6.5" wide in my software, then glued it to the back of my wrapping paper with a glue stick. BEFORE cutting out the shape, I scored along the fold lines (shown as dashed lines on the diagram). Accuracy is important or the ornament may be crooked when it's finished -- use a straightedge and run your scoring tool along each fold line (a bone folder is ideal, but a metal knitting needle works well, as does a ballpoint pen that has dried up).
Only AFTER you've scored all the folds, cut out the ornament carefully -- once again accuracy matters! I use scissors for cutting, but some people prefer a craft knife. Pre-fold the shape along all of the scored lines, and then glue the shape together with tacky glue. Using a toothpick, apply a light coating of glue to one tab at a time. Bring the edges together and finger press the tab in place until the glue grabs, then move on to the next tab. (The glue tabs are marked with an "x" on the diagram).
Although there's no strict order in which you need to glue the ornament together, there are a couple of rules of thumb. First, you will always be gluing a triangle to a square -- never a triangle to a triangle or a square to a square. Second, the last segment to be glued down is the square that has no glue tabs (the one indicated by the red arrow in the template at the bottom of this page).
And finally, it's easier to assemble the ornament if you begin gluing at the end opposite to the final square (that is, the end shown to the left in the template).
Depending on the card stock I am using, I might give the whole thing a light skim coat of podgy once the shape is assembled, just to seal the image. If I am making my ornament from greeting cards I usually don't bother, since most commercial cards have a nice finish on them already, but if I am working with an image that I have printed on plain cardstock I will usually take this extra step.
When my ornaments have dried, I poke a hole top and bottom with a long needle and thread through a length of craft wire. I like to add a flat bead or washer, then a round or decorative bead, then trim the wire approximately 1/2 to 3/8" and make a loop using round-nosed pliers. Do the same to the wire at the bottom of the ornament.
To make the dangle, I select several random beads in colors chosen to coordinate with the colors on the ornament. I thread these onto head pins, leaving about 1/2" at the top, then form a loop with the round-nosed pliers. I attach two or three of these dangles to the bottom of the ornament using a jump ring.
For the top, I usually add a small beaded segment made from a length of craft wire; make a loop in one end with round-nosed pliers, then string on some colorful beads, then trim the wire to about 1/2 or 3/8" and finish off with a second loop. Attach the unit to the top of the ornament with a jump ring.
If it's half decently taken care of and not stored in a damp area, this cardstock bauble will grace your tree for years.
Not just for Looney Tunes . . . !
I have made well over four dozen of these cube-octahedron ornaments over the past 10 or 15 years, for my own tree and for gifts to other people, and the first ones are still as nice now as they were when I made them. Below are two more of these beautiful ornaments -- made with non-Looney Tunes themes.
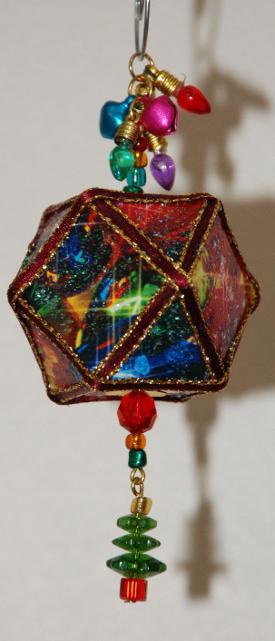
This is one of my favorites, made from a Christmas card with a close-up picture of Christmas lights. Once the ornament was assembled, I trimmed the folded edges with narrow gilt-edged ribbon, then added some Christmas bulb dangles on top. The bottom dangle is a beaded Christmas tree shape.
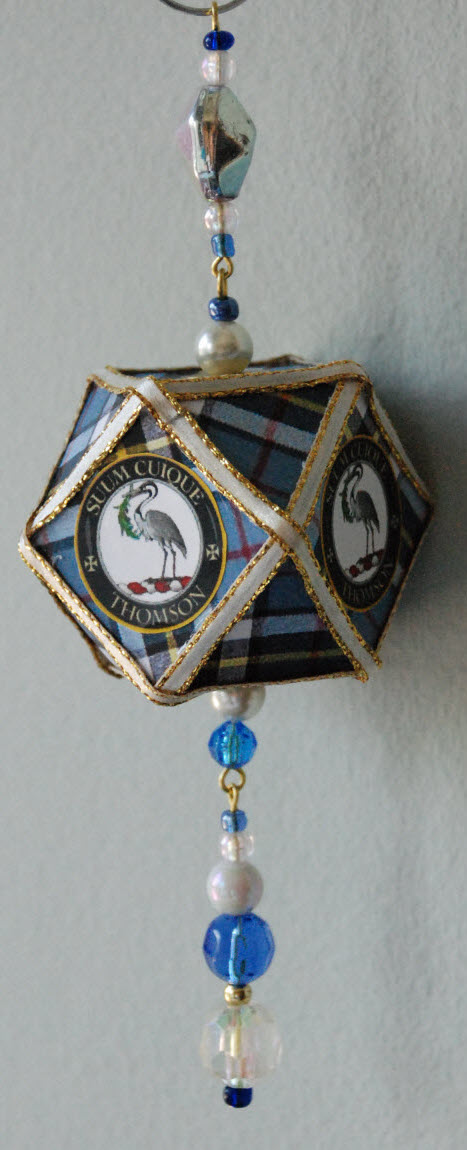
This one, also trimmed out with gilt-edged ribbon, is made from a print of a Scottish tartan. The badge motifs were fussy-cut separately and glued in place once the ornament was finished. I like the look of the ribbon trim but it's finicky to apply. If you do decide to try, choose 1/8" ribbon and use tacky glue to attach it to the ornament.
The Template
I sized the diagram below to 6.5" when I printed it to make my ornaments. This size produces a finished cube-octahedron of about 1.5" wide, which is a nice size if you would like to add the dangles to the bottom. Anything much larger tends to dwarf the dangles, while anything much smaller would be difficult to fold.
To save the cube-octahedron shape, right-click on the image below and save to your computer. You can size and print it directly from your photo software, or import it into Word, where you can set the exact size you want. If you are using giftwrap or other lightweight paper to make your ornament, print the shape on plain cardstock and glue it to the back of your paper before cutting it out. If you are making your ornament from a Christmas card, print the shape on plain paper and glue it to the back of the card. Score on the lines, then cut out the shape and pre-fold on all the scored lines before gluing your ornament together.
If you don't plan to use dangles on the bottom or your ornament, you can print as large as your cardstock permits; personally, I don't like to go much more than 7.5" for the print-out because I prefer the look of the smaller size in the finished ornament.
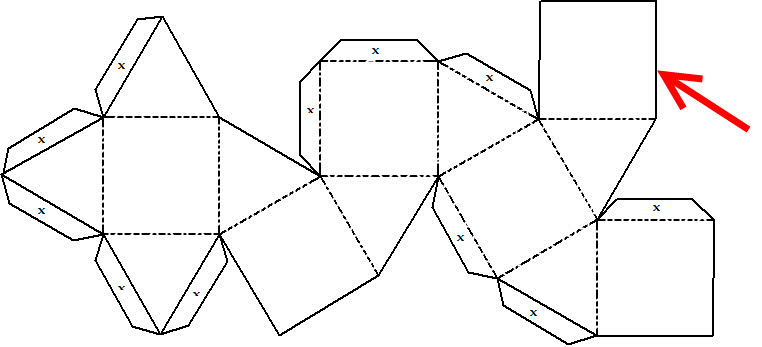
The panel without tabs (marked by the red arrow) is the last one to be glued down. Begin gluing at the side opposite the last panel (shown at left on the diagram). Size the diagram to approximately 6.5" wide in your software.
A Variation on a Theme
When I was a kid I was very taken with traditional glass ornaments, especially those that have sparkly indentations in the middle. I still love them, and I decided to try to replicate that effect in these cardstock ornaments. The result was the ornaments below.
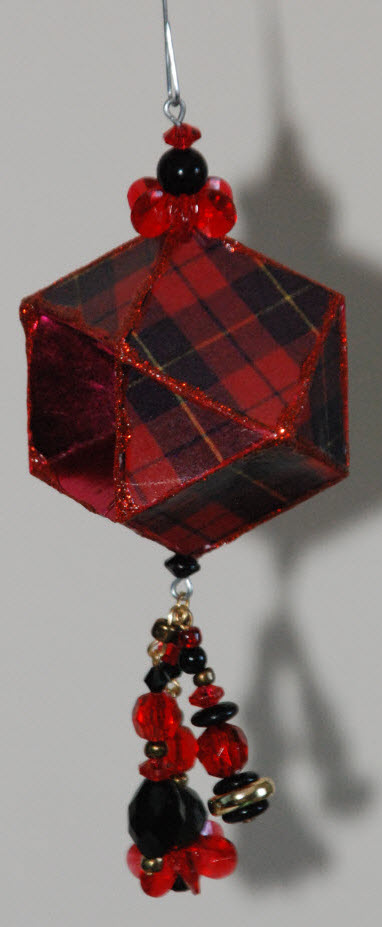
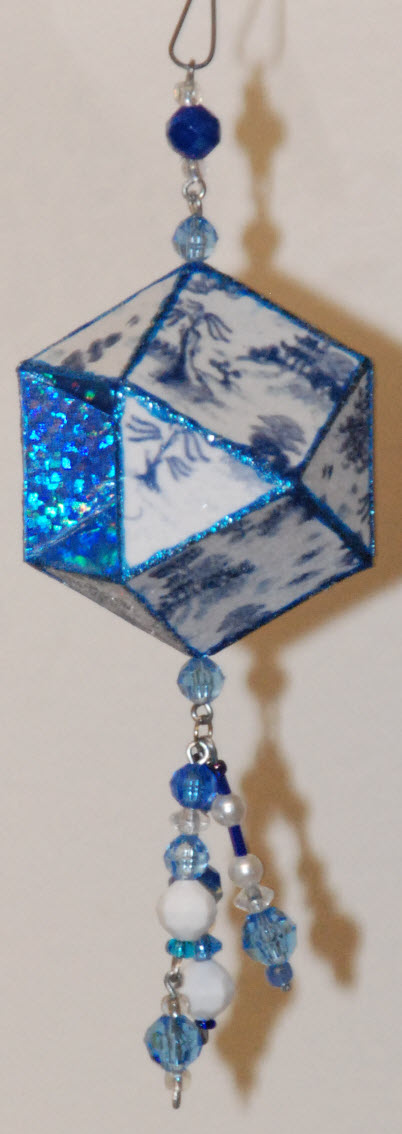
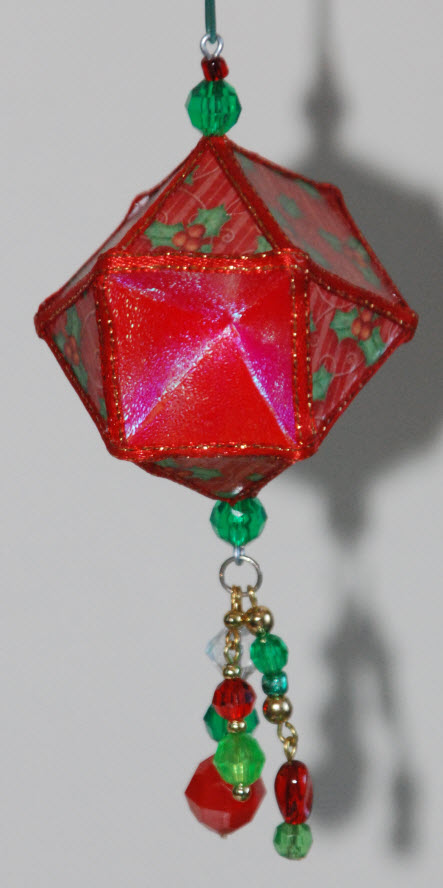
These ornaments are suspended from one corner rather than from one of the flat surfaces like the ornaments above. Each ornament has two indentations, one on either side, although you could choose to make only one indentation.
To make these, I constructed the ornaments as usual, then sliced an X-shape in one panel of the finished ornament, cutting corner to corner. I folded the resulting triangular flaps toward the inside of the ornament to create an opening. To fill the opening, I made a small hollow pyramid from cardstock, which I had lined with glittery foil or prismatic paper. By experimenting a bit with the shape, I sized this shallow pyramid shape to fit the opening in the side of the ornament. Then I spread glue on the tabs created by the slashed panel and pushed the pyramid shape into the opening, matching the edges.
To make a double-indented ornament, repeat this procedure with the panel on the opposite side. When the glue has dried, finish the ornament as usual.
I am quite pleased with the effect and have already made several for gifts as well as for my own non-Looney Tunes tree.