
Plastic Laminated Ornament

These ornaments were made by laminating stickers and other cut-out images in plastic, then trimming and joining several laminated bits together using jump rings. This produces a lightweight ornament that incorporates lots of movement.
I used a thermal laminating machine to make my ornaments, but instead you could use a cool laminator, or even pressure-sensitive laminating film that you apply by hand.
My images are from a variety of sources, including several sheets of stickers and some Christmas cards. The cards I used as-is, but I glued the stickers and other images to 110lb card before proceeding (the discarded back of a Christmas card will work fine for this).
I like to add something to decorate the backs of the ornaments. For example, I might glue metallic wrapping paper to the back before cutting out the images, or glue them to colored card stock instead of plain white. It's also fun to write a message or date on the back before laminating.
Once the images were mounted on cardboard, I carefully fussy-cut each one, trimming close to the edge without cutting through the drawn lines. Then I placed the cut-outs into small laminating pouches and ran them through my heat- laminating machine. Depending on the size of your images, you might be able to do more than one image per pouch, but be sure to leave enough space between them for trimming afterwards.
Also, you will need to take care in handling the pouch as you place it into the laminator, because the cut-outs can shift from the pressure of the laminating rollers and get pushed into each other. Using the carrier pouch that comes with the laminating sheets will help reduce the likelihood of this happening, as will positioning the images so that there is the maximum space between them.
When you are sure about the placement inside the pouch, run it through the laminator. Let the images cool, then carefully trim them with scissors, leaving enough of a plastic border to keep them sealed inside.
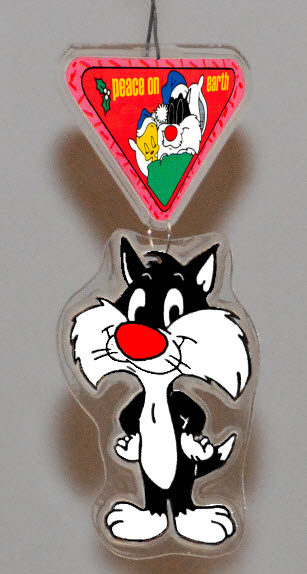
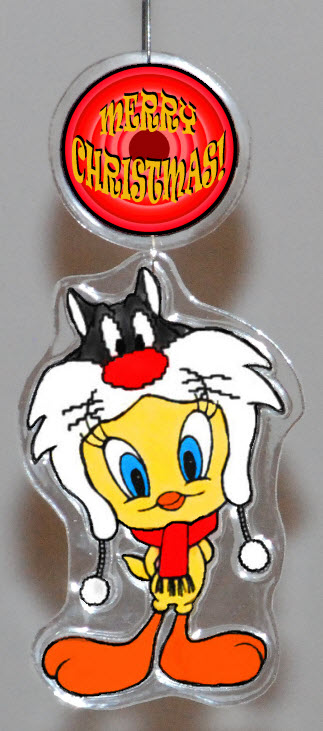
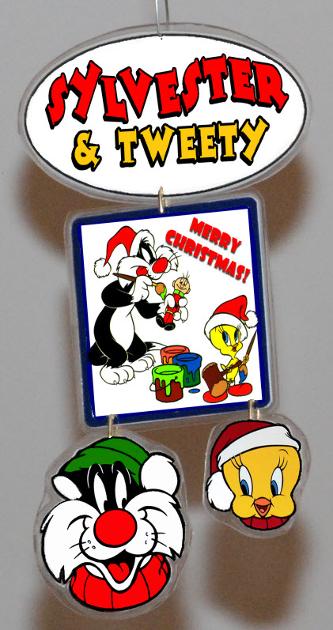
Once you have made several laminated shapes, lay them out on a flat surface and arrange them into a pleasing configuration for each ornament. Part of the charm of these ornaments is the way they move, so I always use more than one image per ornament.
Taking care to locate the balance point for each laminated item, punch tiny holes with your smallest hole punch -- I used a 1/16" size. Bottom dangles will need only a single hole at the top of the image, but top and middle units will need two or possibly more holes.
Assemble the laminated units into ornament groups and join them together using jump rings. The more laminations your ornament includes, the more it will move when on the tree.
If you are making your ornaments from images printed on a computer, you can make them two-sided by printing a reversed version. Cut out both versions and carefully glue them back-to-back before laminating.
I like these simple ornaments for several reasons. First, they're really versatile: you can use any image as long as it can be laminated, which means you can have an ornament featuring any theme you can dream up: family memories, favorite characters from fiction or cartoons, symbols of your profession, or family coats of arms. And you can laminate quite intricate shapes, fussy-cutting them by hand or with a computerized cutting machine.
Second, they're lightweight and unbreakable, meaning they can hang on the very tip of the tree branch, and they won't break if they should fall or be knocked from the tree by a playful pet.
Third, the charm of these comes in large part from the movement generated by the multiple units connected with jump rings. Although you can certainly make laminated ornaments using a single shape, I find that several smaller elements make a nicer ornament than a single larger item.
Finally, you can decorate them however you please. If you like, you can add other dangles to a laminated ornament -- jingle bells are always a good choice, as are beaded dangles. You can also glue buttons, rhinestones, or other decorations to the surface of the laminated image for added interest, or separate the laminated items with beaded inserts.