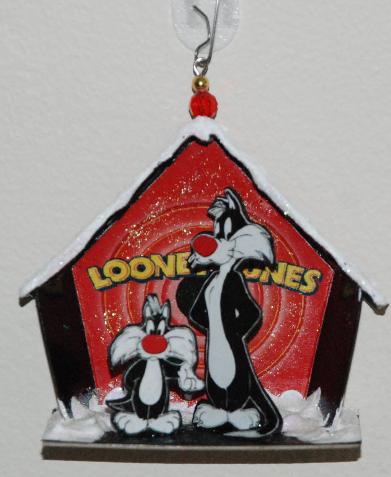
Mini House Diorama Ornament
This ornament was inspired by those vintage diorama house ornaments that were so ubiquitous when I was a kid. There are many examples on the Internet, and I used to have a link to a great tutorial, but it seems to have disappeared, so I've added more detail to this post.
My version of the mini diorama house is about 3" at its widest point and was made with double layers of cardboard glued together with glue stick and tacky glue. I've posted a template at the bottom of this page.
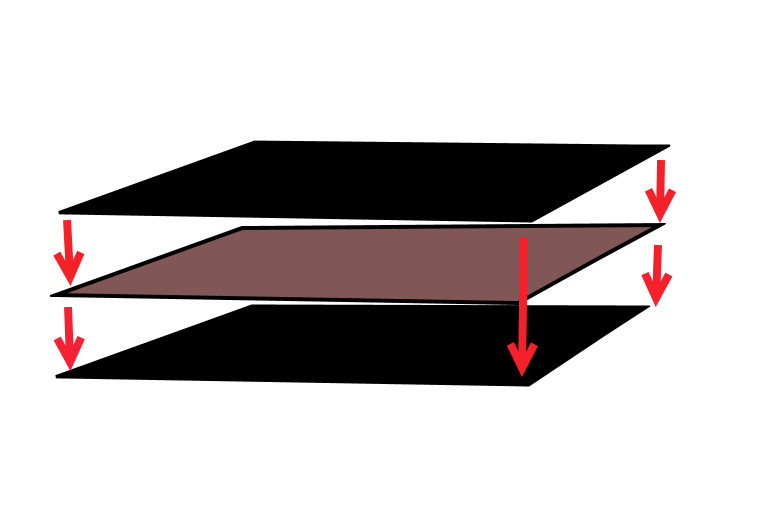
I made the floor of my house from two pieces of heavy black construction paper and one piece of cereal box cardboard. I used a glue stick to laminate the three pieces together, sandwiching the cereal box cardboard between the two pieces of construction paper.
I printed the pattern for the back and side walls of the house onto 110-lb cardstock and cut it out, then cut a second shape from heavy-weight black construction paper, and glued the two together. (If you prefer sturdier walls, you could add another layer of black construction paper.) Then I scored all the fold lines.
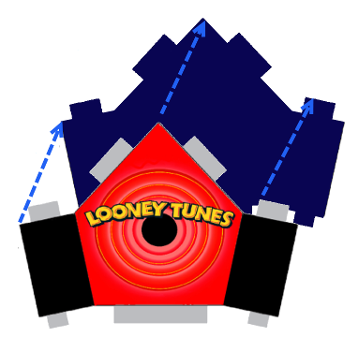
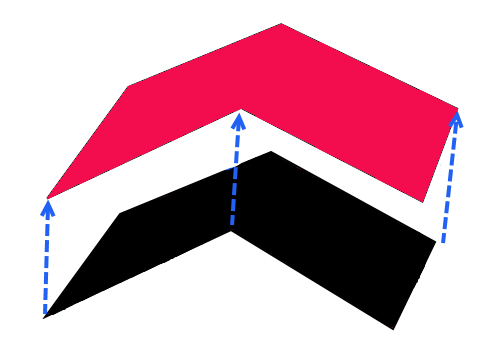
To make the roof section, I cut and scored two pieces: one from black construction paper and the other from red sparkly scrapbooking card. I used tacky glue to stick the black construction paper to the underside of the roof piece, and set the roof aside to dry while I put together the rest of the house.
To assemble the walls to the base, I scored along all of the fold lines using an embossing tool or the point of a knitting needle. I foldedall the tabs and the two walls toward the front of the structure so that the printed image will show on the inside of the house.
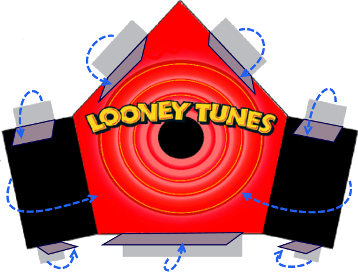
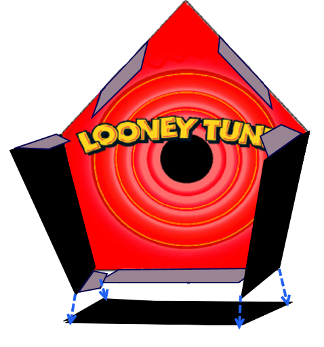
Using a toothpick, I applied a small amount of tacky glue to the bottom of the floor tabs and lined up the walls with the dotted lines on the floor template below. I pressed the tabs in place until the tacky glue grabbed (this should take only a few seconds), then set the house structure aside to dry for a few minutes.
When the floor and walls were dry, I gave the whole structure a light skim coat of Mod Podge and let that dry as well. Once the Mod Podge was dry, I covered the tabs on the inside bottom with some "snow" made from texture medium or gesso. I mounded some snow into piles in the corners of the house and around the outside. To give the snow a bit of sparkle I sprinkled on fine iridescent glitter while the gesso was still wet, then set the whole thing aside to dry while I prepared the figures and finished the roof.

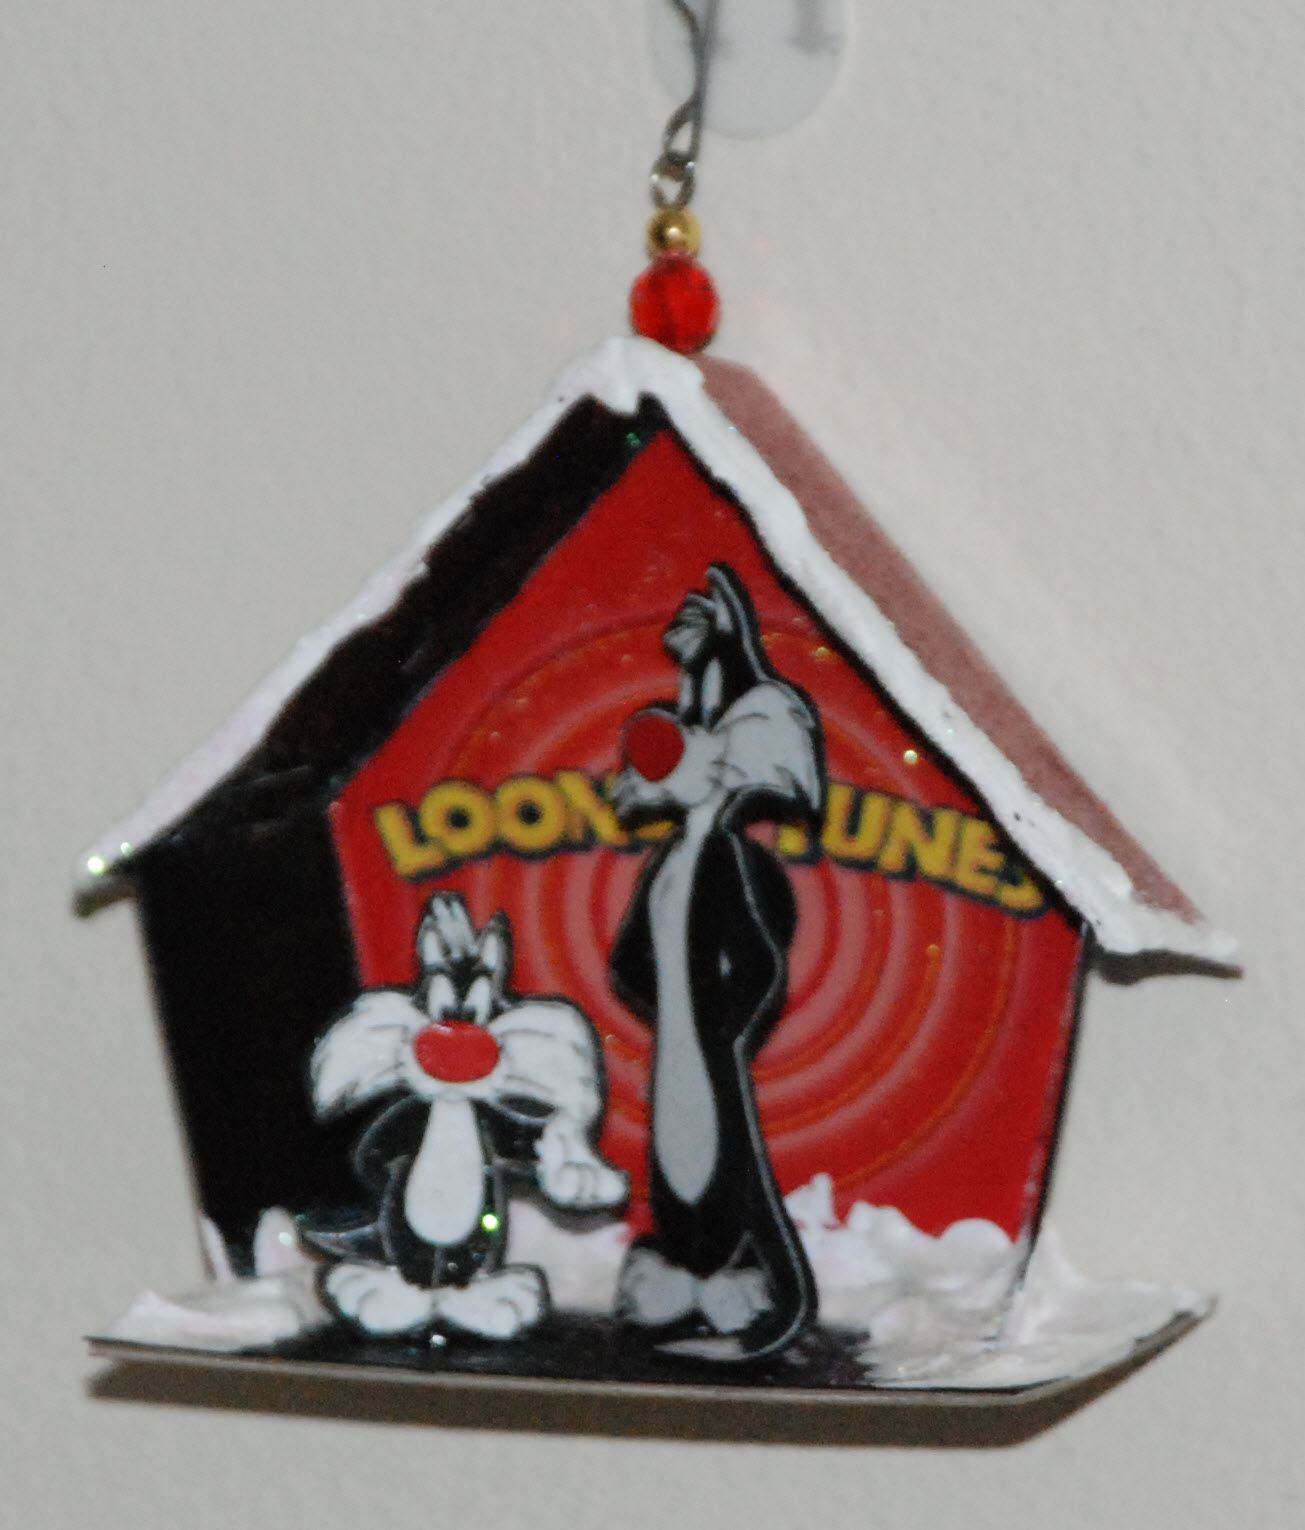
Pretty much any small figurines will work for the diorama house, but I wanted Sylvester and Junior. I didn't have any appropriate figures, so I printed and cut these two images from 110-lb cardstock. To strengthen them, I glued them to two layers of heavy weight black construction paper and cut them out again. To help ensure that they would stand, I made a small triangle of black construction paper as a stand for each figure and glued it to the back. When the glue had set, I gave the figures a light skim coat of Mod Podge and let them dry.
Once everything had dried thoroughly, I positioned the figures in the house frame and glued them in place with tacky glue.
To finish the ornament, I spread tacky glue on the tabs and on the top edges of the house walls and glued the roof into position, holding it in place with my fingers until the glue grabbed. I waited a few hours for the glue to dry, then added a bit of gesso snow to the edge of the roof.
I wanted to be able to hang my ornament on the tree, so I used a darning needle to poke a tiny hole in the peak of the roof, placing it at the balance point so the house will hang straight. The exact point will vary, depending on the weight of the figures and the positioning of the house on the base. Mine ended up being slightly toward the front of the roof.
Once I'd located the balance point, I used round-nosed pliers to make a small loop in one end of a 2" length of craft wire, then ran it through a seed bead, then up through the hole in the roof, where I added a couple of additional beads and finished with a small wire loop. This will allow me to attach a hook for hanging the ornament.
Not Just Looney Tunes
Although my house ornament features Sylvester and Junior, you can make these using any figures or any theme you wish, like these two that I made for friends.
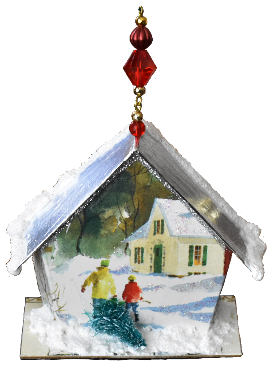
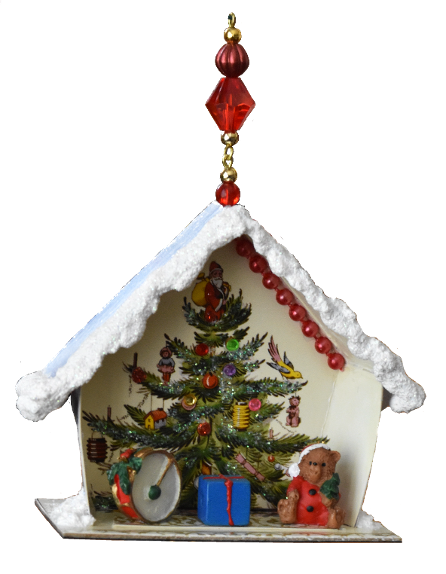
I made this version from a Christmas card, and added some little figurines of toys in front of the Christmas tree. The back shows a scene from a second card: Dad and Son hauling the tree home. A tiny sisal tree adds extra dimension.
Here's the template I used to make one of these ornaments for a friend whose birthday is Christmas day. This one would work well with small figures of Santa or snowman, or a birthday cake and presents. If I remember correctly I added a string of mini Christmas baubles along the roof line.

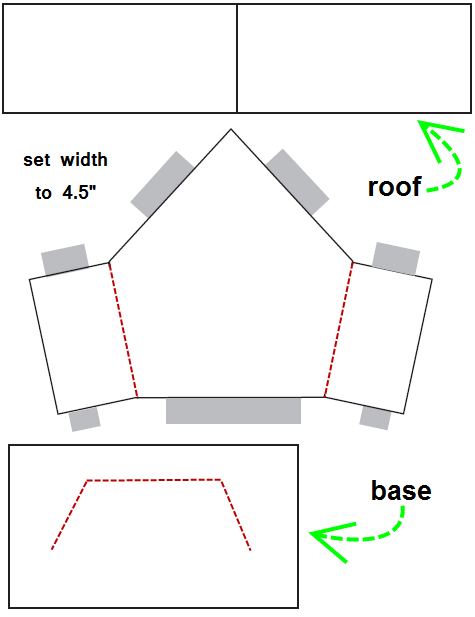
Diorama House Template
To obtain a finished ornament the same size as the one I made, import this image into your software (I used Word to print my template) and set the size to 4.5" wide, keeping the same aspect ratio. Then use this as a pattern for your own house ornament and follow my instructions, above.