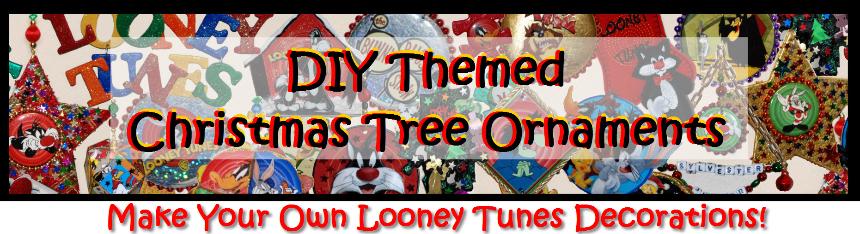
Button-Badge Ornament
Novelty buttons can be picked up at tourist shops and gift stores, and vintage versions can often be found cheaply at thrift stores. They can all be re-purposed into terrific ornaments showcasing a favorite rock band, vintage TV shows, tourist destinations, political causes . . . or Looney Tunes! If you happen to have a button press of your own, the range of designs is unlimited. (If you don't have a press, here are some alternatives; you can also make a similar ornament from two juice can lids.)
Before making up the buttons in the pictures, I used a metal punch to make a small hole in all four component button parts to enable me to insert a jump ring through the completed ornament. I like this method, but you won't have that option if you are using pre-made buttons, so I suggest an easier alternative for hanging the ornament.
Instead, you can cut a length of string, ribbon, fishing line, or fine craft wire about 6-8" long. Fold it in half to form a loop, and sandwich the ends of the string or ribbon between the buttons when you glue them, leaving a hanging loop protruding from the top of the ornament. If you prefer to hang your ornament with a hook, as I do, you can make the loop just large enough to accommodate the hook.
I use GOOP or E6000 to glue the ornaments together. Be sure to align the images so they will both be
right side up when the ornament hangs on the tree. (Click here to find out why I don't use hot glue for making these ornaments).
To finish up the ornament, I like to add a beaded segment; cut a length of 18-gauge craft wire and make a loop in one end with round-nosed pliers, then string on some beads in colors to match the ornament images.
Trim the wire to about 1/2 or 3/8" and finish off with a second loop. Attach the unit to the top of the ornament with a jump ring.

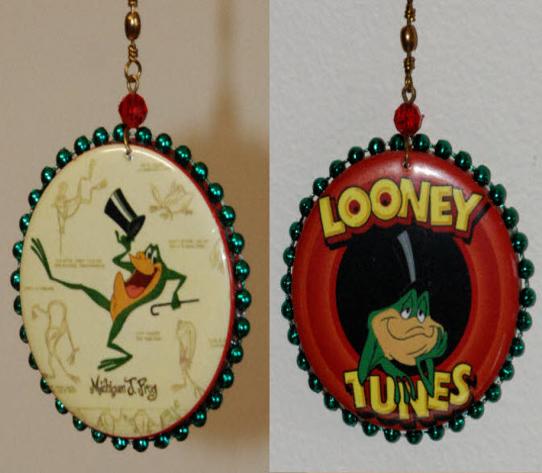
Although he appeared in only one cartoon, Michigan Frog is a perennial favourite. I couldn't resist this image of him dancing.

I used the same image for both sides of this one, but with different coloured backgrounds. Looking at it now, I kind of wish I had reversed the image for the second side.
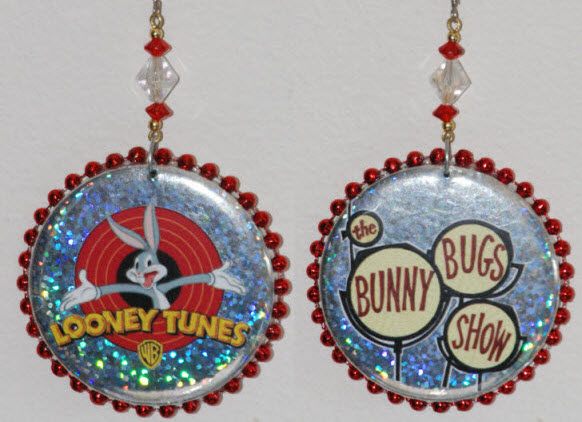
This glittery Bugs ornament is one of my favourites. To make the buttons, I fussy-cut the images and glued them to prismatic wrapping paper. The cutting was painstaking, but I really like the sparkly effect of the prismatic paper.
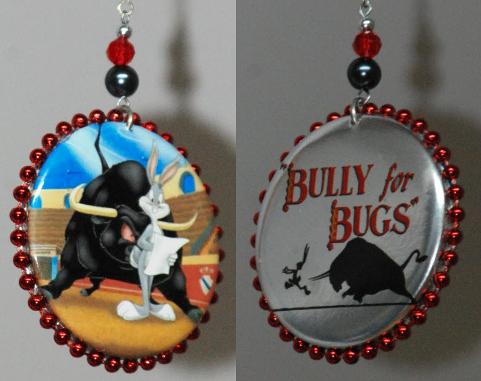
The silvery surface of the "Bully for Bugs" title side is a bit of a hack. My printer can't print metallic colours, so I laser-printed my image on a transparency and laid it over silver wrapping paper -- nifty, isn't it? To protect the printed image from damage, I printed it in reverse, and then made up the button with the printed image facing in. The printed transparency replaces the mylar on the finished button.
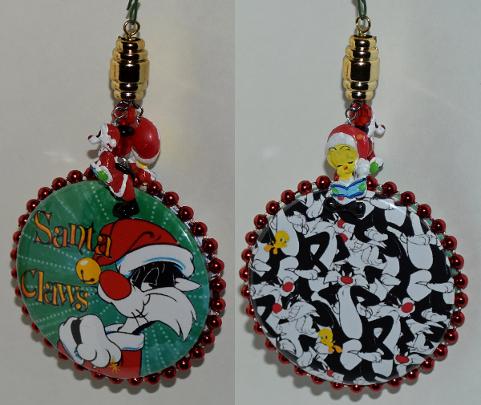
I Iove the combination of the "Santa Claws" image and the Sylvester wallpaper on this ornament.
For extra interest, I added the tiny Sylvester and Tweety figurines as dangles at the top. There's a spinner hidden beneath the gold bead so that the ornament can turn freely on the tree.

I actually made this hilarious ornament with my 3.5" button maker, but although it's quite a bit larger than the others, it's made in the same way. The "bomb" is made from a large wooden bead with a dowel inserted in the middle and red string for a wick. I printed the word "ACME" on the bomb with white paint.
Not just for Looney Tunes ...!
You can make button-badge ornaments using any theme
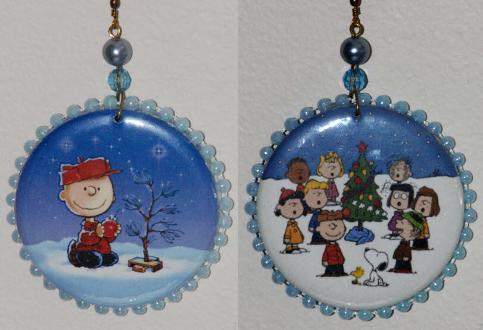
"A Charlie Brown Christmas" was my brother's favorite Christmas special when he was a kid. This ornament brings back some wonderful childhood memories.
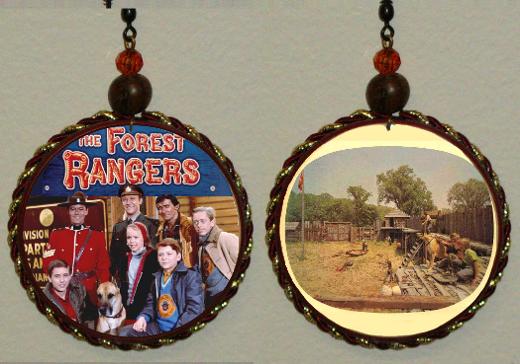
I used braid instead of fused beads to trim out my "Forest Rangers" ornament -- it was one of my own favorite childhood TV shows. The ornament has the cast on one side and an aerial view of the fort on the other.
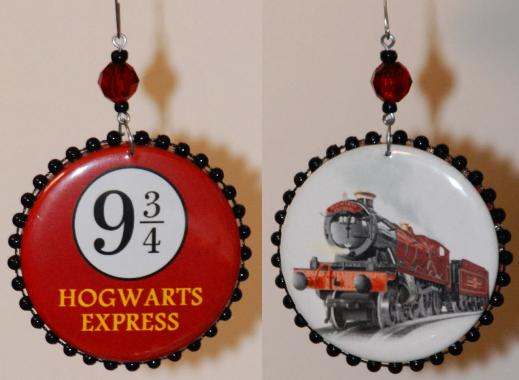
Make a Hogwarts Express ornament even more special by adding a child's name in the white space just above the train engine. The black fused bead trim is a perfect choice to complement the images.
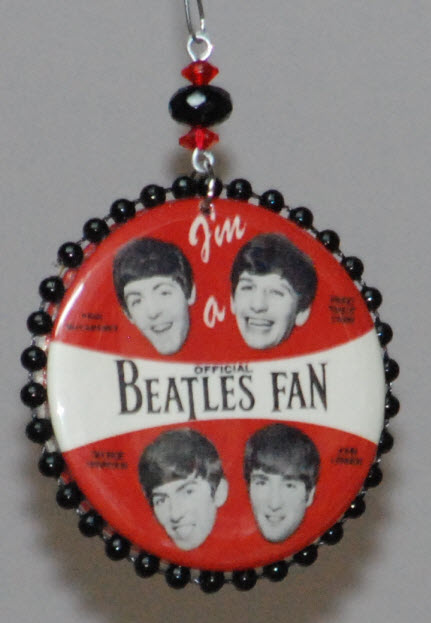
As a teenager, my sister was an enthusiastic Beatles fan. This vintage button is a terrific image, and will make a perfect ornament for her Christmas tree. It has the same image on both sides.
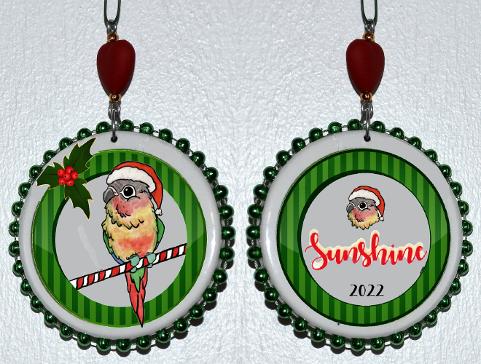
My sister's best friend has had a pet conyer (a kind of parrot) for years. . . and as my sister explains, "he loves that bird!" He's also going to love this new ornament, which has the bird's name and the date on the reverse side. I'm not sure you can make it out, but the beaded component is a heart.
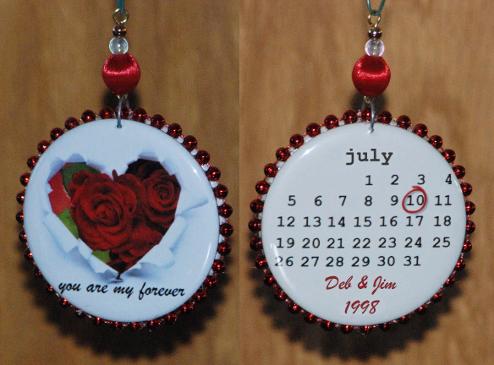
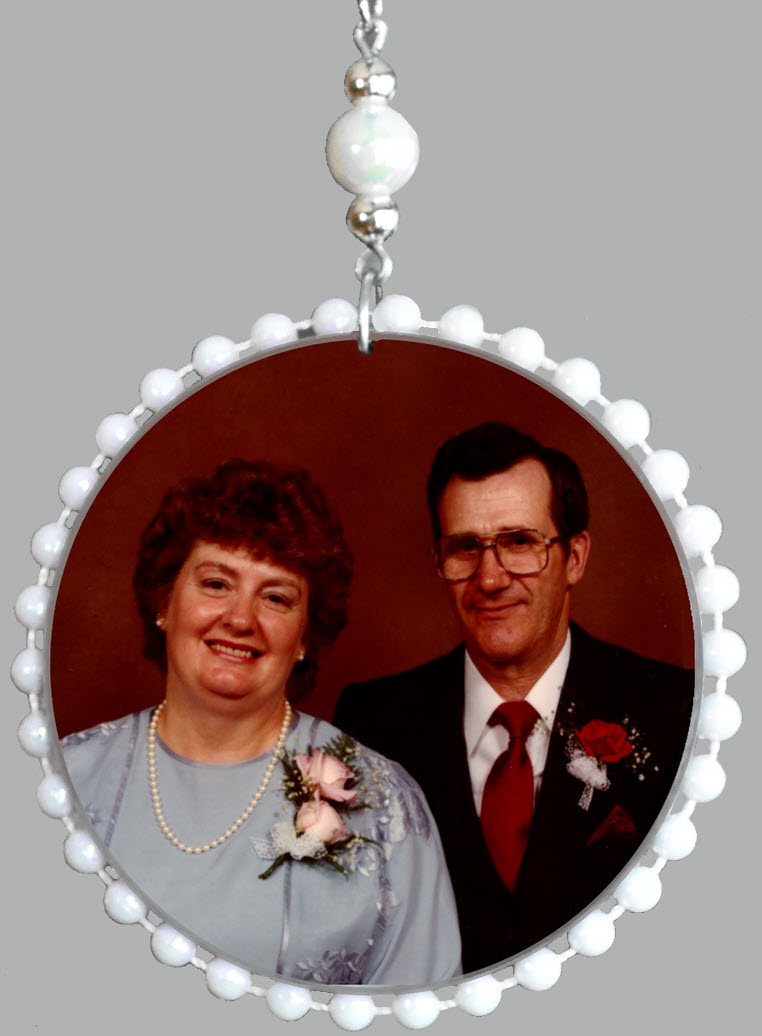
To make it especially meaningful, use a wedding photo in place of the roses, as I did on this one of my friend's parents (right).
A special ornament to commemorate a wedding or anniversary makes a thoughtful memento.
The great versatility of these button ornaments is immediately apparent: they can be made with literally any image or message, and personalized in any way that suits you. I have made dozens of them, featuring pets, family coats of arms, favorite TV shows and characters, images of places visited, special occasions, nostalgic locales, hobbies, significant people. They are easy and fun to make and add a personalized touch to your tree.