3-D Paper Tole Ornament
All you need to make these 3-D style ornaments are multiple copies of the same image, scissors or a craft knife, podgy or glue, and patience!
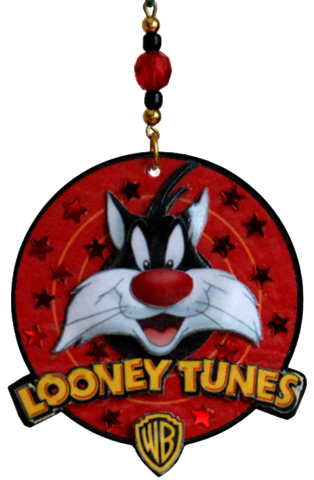
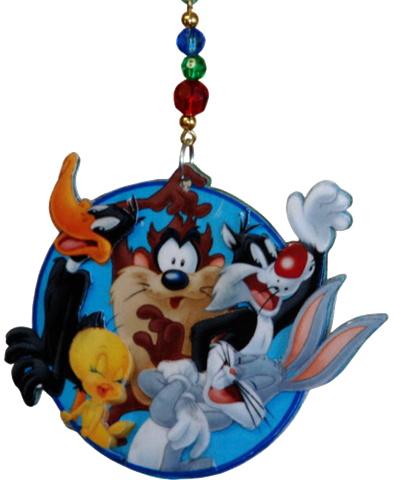
The red ornament is about 3" wide and the blue one is about 4" wide including Bugs' ears. The 3-D effect is made using a somewhat simplified paper tole technique (There are some very good basic paper tole instructions here).
These ornaments are two-sided, so I made two paper tole structures for each ornament. I used three layers on each side -- which is enough, I think, for a project only 3" wide. I printed the image on 110-lb card stock: three times for the front of the ornament, and then three more times in reverse to make the back side. Then I cut out portions of the image and built up the layers using some acrylic caulk that I had on hand.
RED ORNAMENT LAYERS
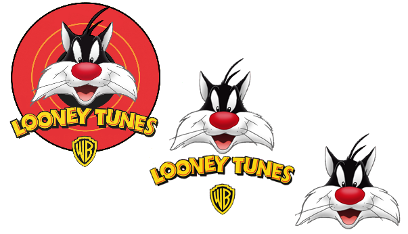
Layer 1: Entire Image
Layer 2: Cat's Face, "Looney Tunes" word, WB logo
Layer 3: Cat's Face only
BLUE ORNAMENT LAYERS
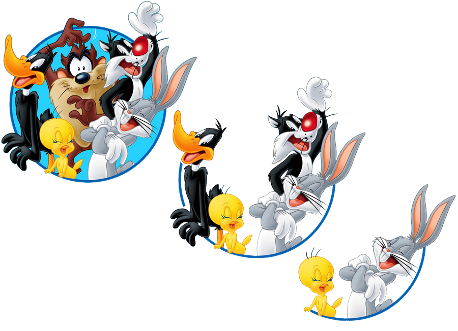
Layer 1: Entire Image
Layer 2: Daffy, Tweety, Bugs, Sylvester
Layer 3: Tweety, Bugs
As a first step, I glued the base image to a piece of heavier card. Then I carefully cut out the base image. I repeated this with the second (reversed) base image. I then glued the two base images back-to-back, matching the edges, to make a sturdy foundation for the ornament. Once the glue had dried on this two-sided base piece, I built up the layers on the first side, using the elements cut from the remaining prints. To make the layers stand out from the foundation piece, you need to use a thick glue or foam dots to create the dimension. I used acrylic caulk, but you could choose a double layer of foam-backed tape instead.
If you have used caulk or glue, allow plenty of time for the first side to dry (several hours or even overnight, depending on the glue you are using). When the first side of my ornament was completely. dry, I turned the ornament over and built up the layers of the second side. Then I set the ornament aside again to allow the glue and caulking to dry thoroughly.
When the whole thing was completely dry (I left it overnight to be sure), I covered it with a layer of podgy and again put it aside to dry once more. Then I gave the red ornament a bit of extra sparkle by gluing on some star sequins. Finally, I punched a hole through all layers so the ornament could hang.
To make the beaded hanger, I just threaded some matching beads onto a small length of 18 gauge wire, and formed loops at either end of the wire using round-nosed pliers. The beaded loop is then attached to the ornament using a jump ring. The layered effect may not show up fully in the pictures but these really do look 3-D in real life.
Whatever theme you decide on for your paper tole ornament, try to select a relatively simple image that can easily be layered to create dimension. If the image is too complex it will overwhelm the small size of an ornament; I find it best to limit the layers to no more than four. For each side of these ornaments, I used only three.